
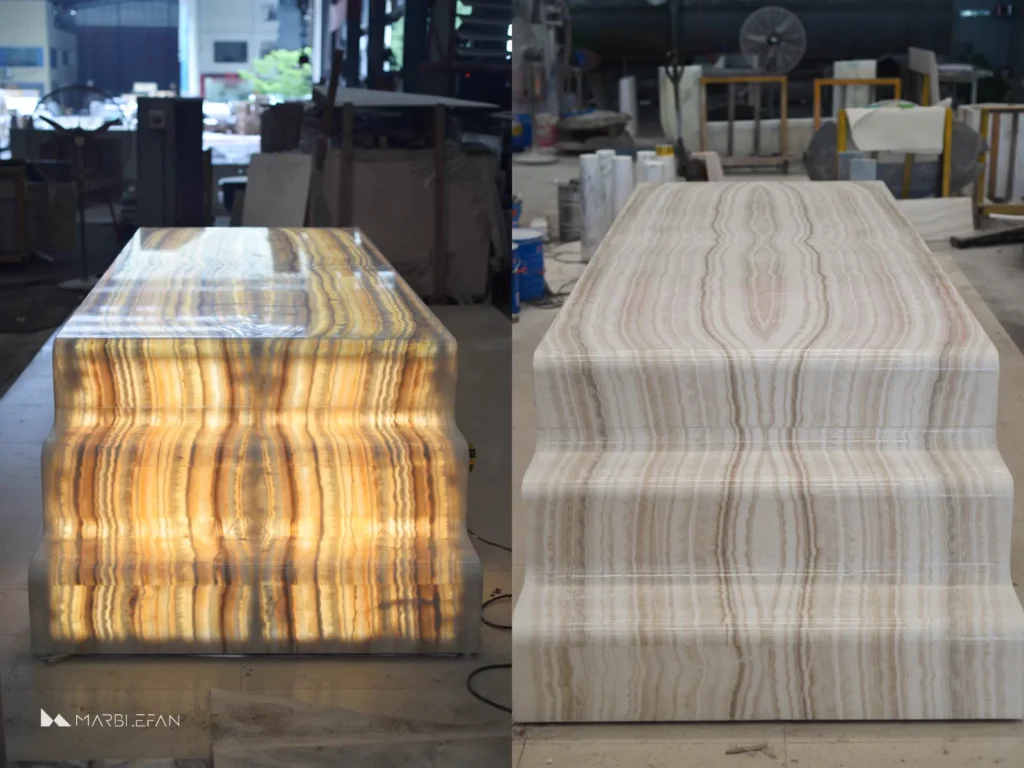
A Sydney project balancing continuous veining, modular transport, structural support and even illumination.
At four metres long, this modern, custom backlit marble dining table was conceived as more than a functional surface. Its stepped ends, softly rounded transitions and illuminated natural stone were intended to make the table feel like a sculptural centrepiece — quiet in daylight, dramatically transformed after dark.
Making that idea buildable required several systems to be resolved together. The stone pattern had to flow across curved and stepped surfaces. The three-metre central span needed reliable support beneath 18 mm stone panels. Lighting had to fit inside an irregular form without creating excessive heat. Finally, the table had to leave the factory in transportable sections and be assembled on site in Sydney.
This is how the design was developed into a production-ready solution.
Project at a Glance
- Location: Sydney, Australia
- Dimensions: 4,000 × 1,200 × 750 mm
- Material: Translucent straight-vein White Jade marble
- Stone thickness: 18 mm
- Key features: Stepped ends, rounded transitions and integrated backlighting
- Transport strategy: Three factory-finished modules for on-site assembly
- Our role: 3D development, vein and seam planning, structural coordination, production breakdown and lighting integration
The Central Challenge: Making the Veins Flow
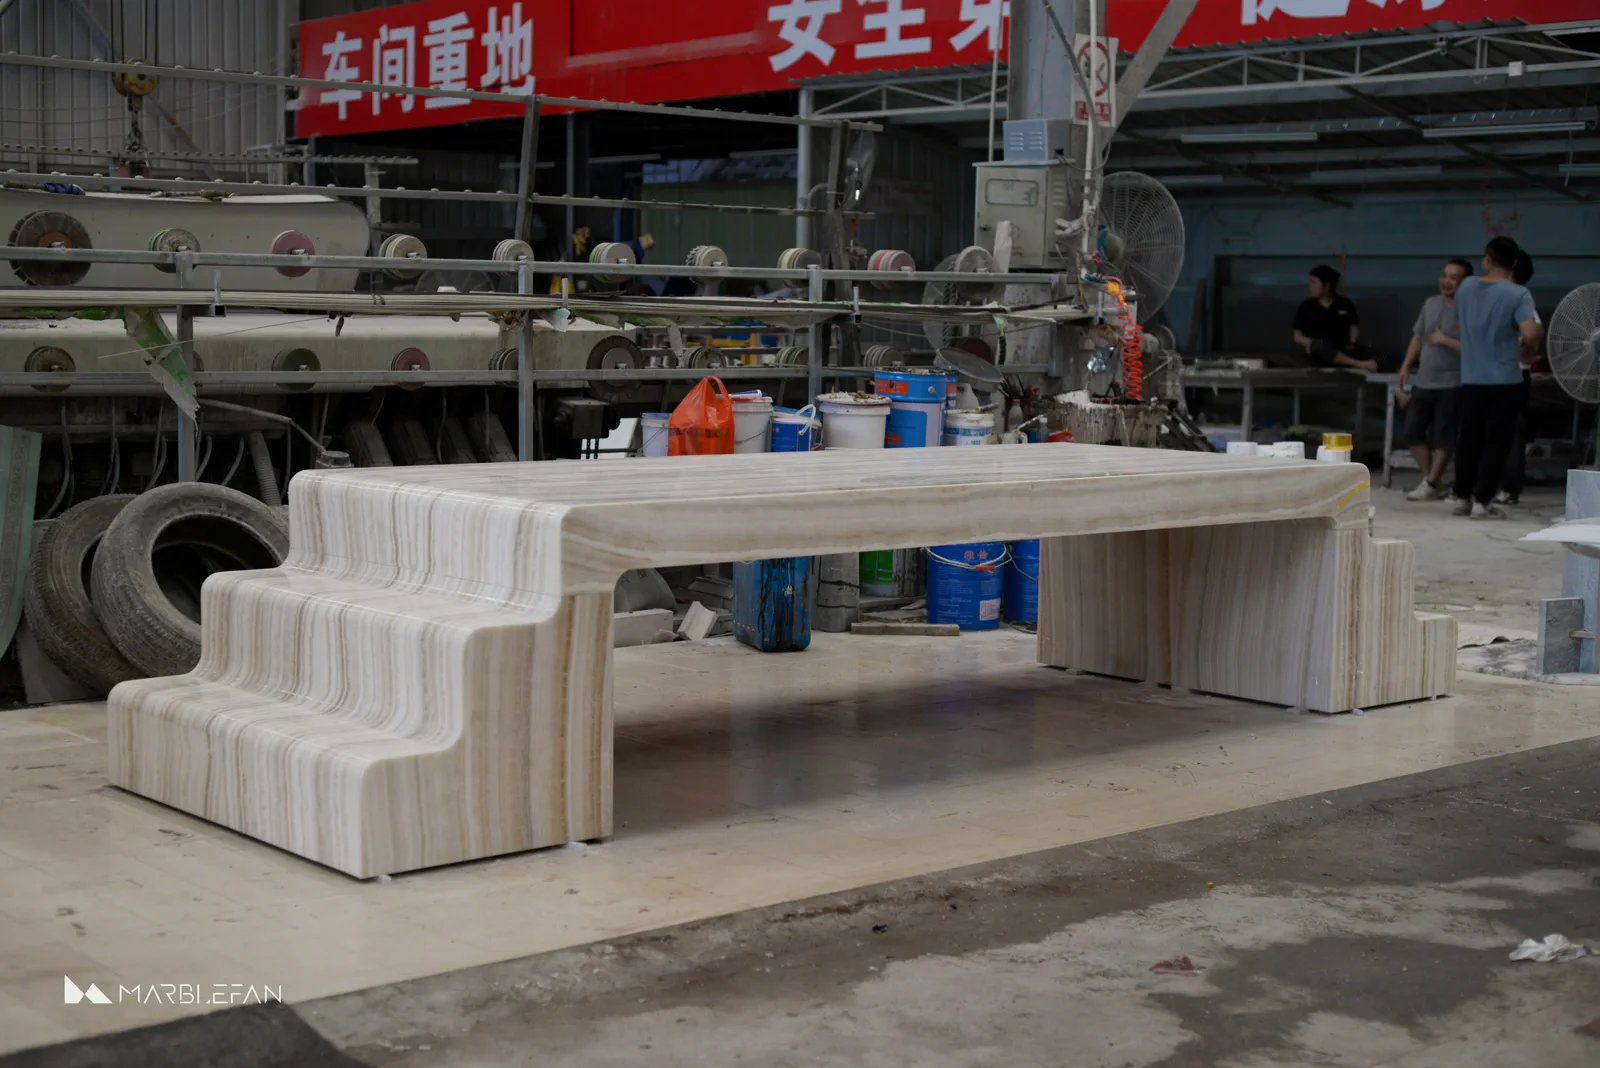
The visual success of this table depended on more than selecting an attractive stone. Straight-vein marble makes every change in direction visible. If adjacent panels are cut without a coordinated layout, the bands can jump, reverse or form obvious visual breaks — especially where a flat surface turns into a rounded step.
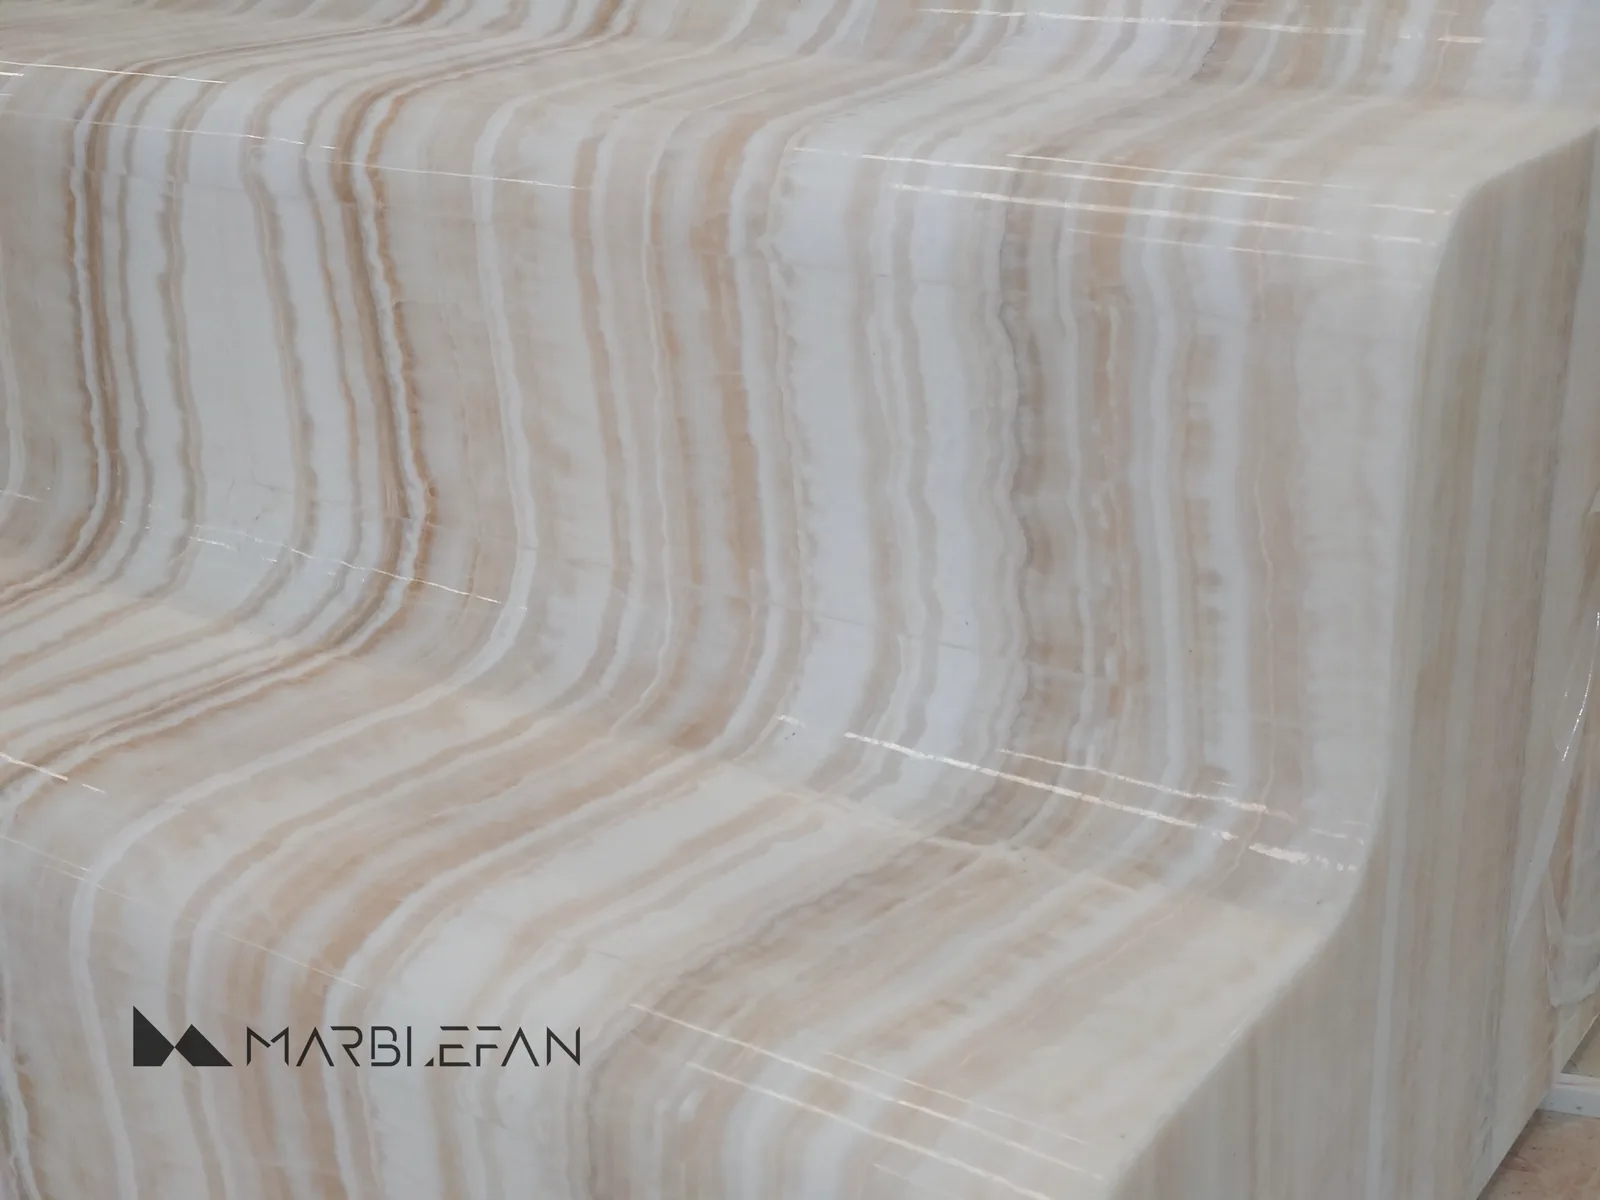
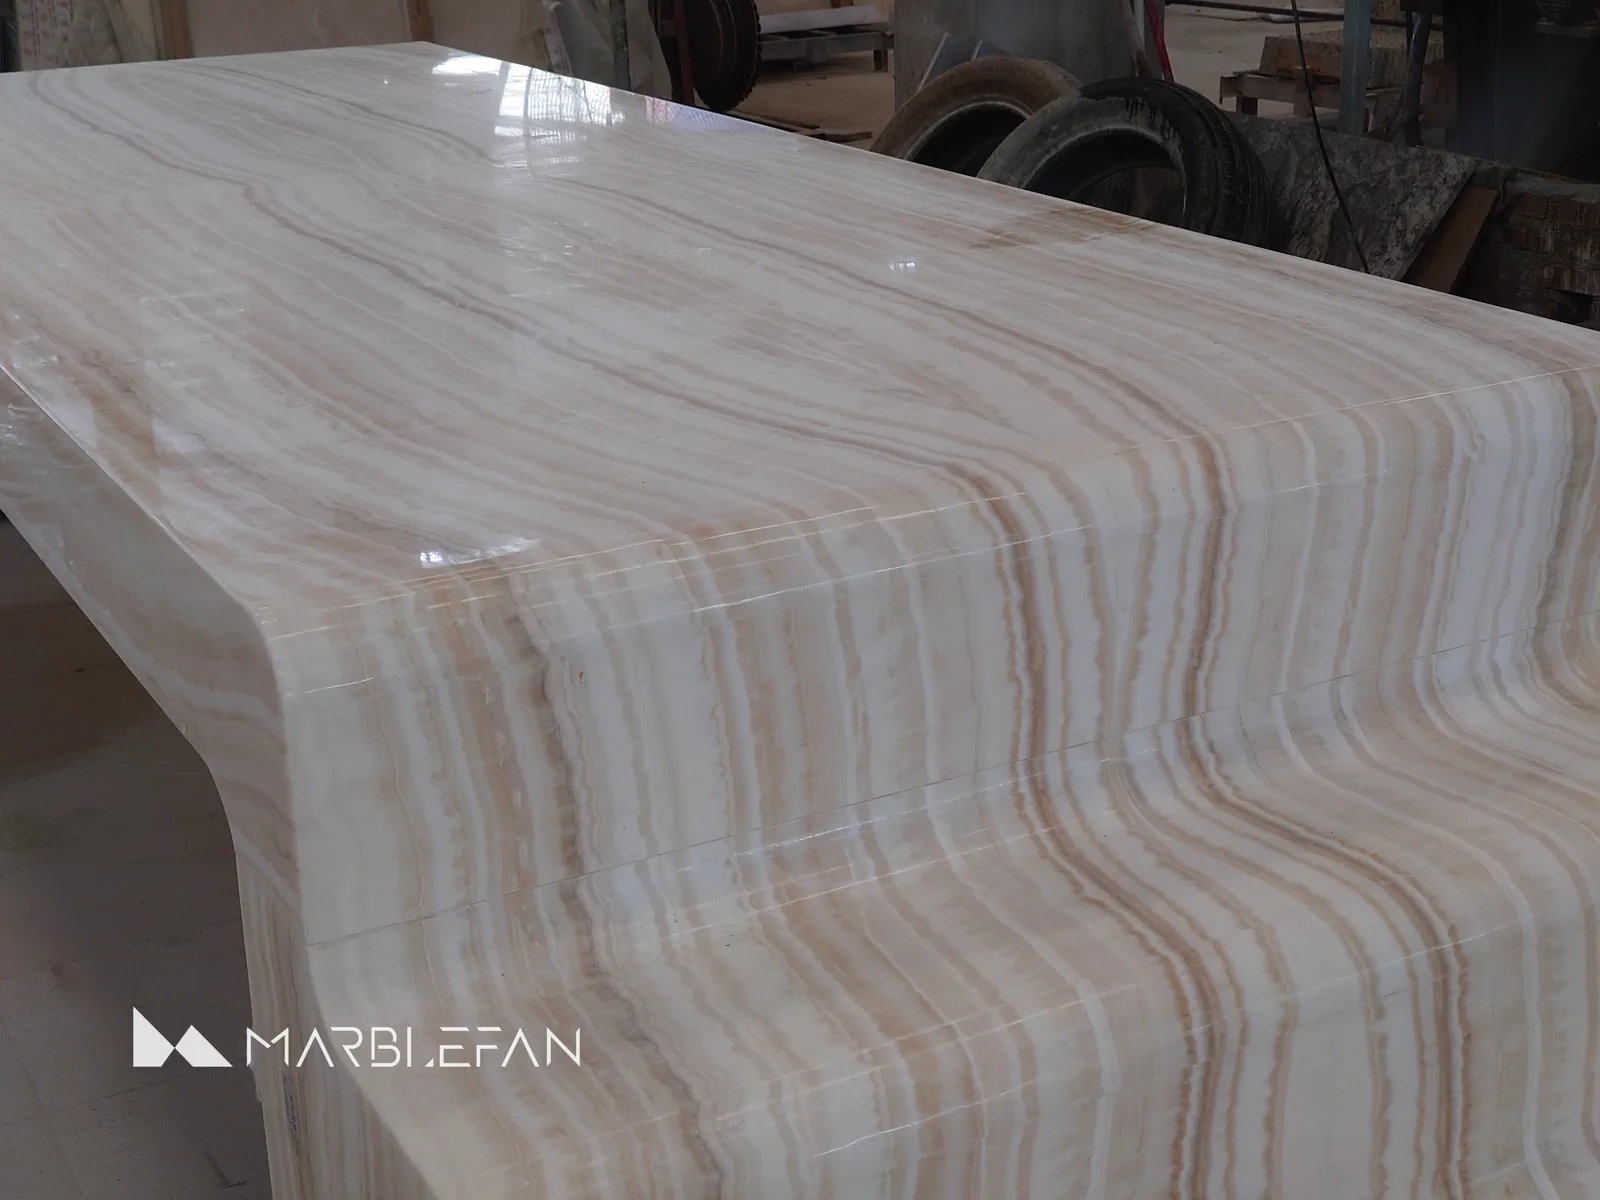
We developed a centred, mirrored layout from adjoining slab faces. This created a more balanced composition along the tabletop and gave the stepped ends a clearer visual rhythm. Wherever possible, larger panels were retained to reduce unnecessary joints.
The aim was not to hide every seam. On a piece of this scale, that would be unrealistic. The goal was to place each necessary seam where the geometry already changed direction, allowing the construction logic to support the design rather than interrupt it.
Designing the Table as Three Modules
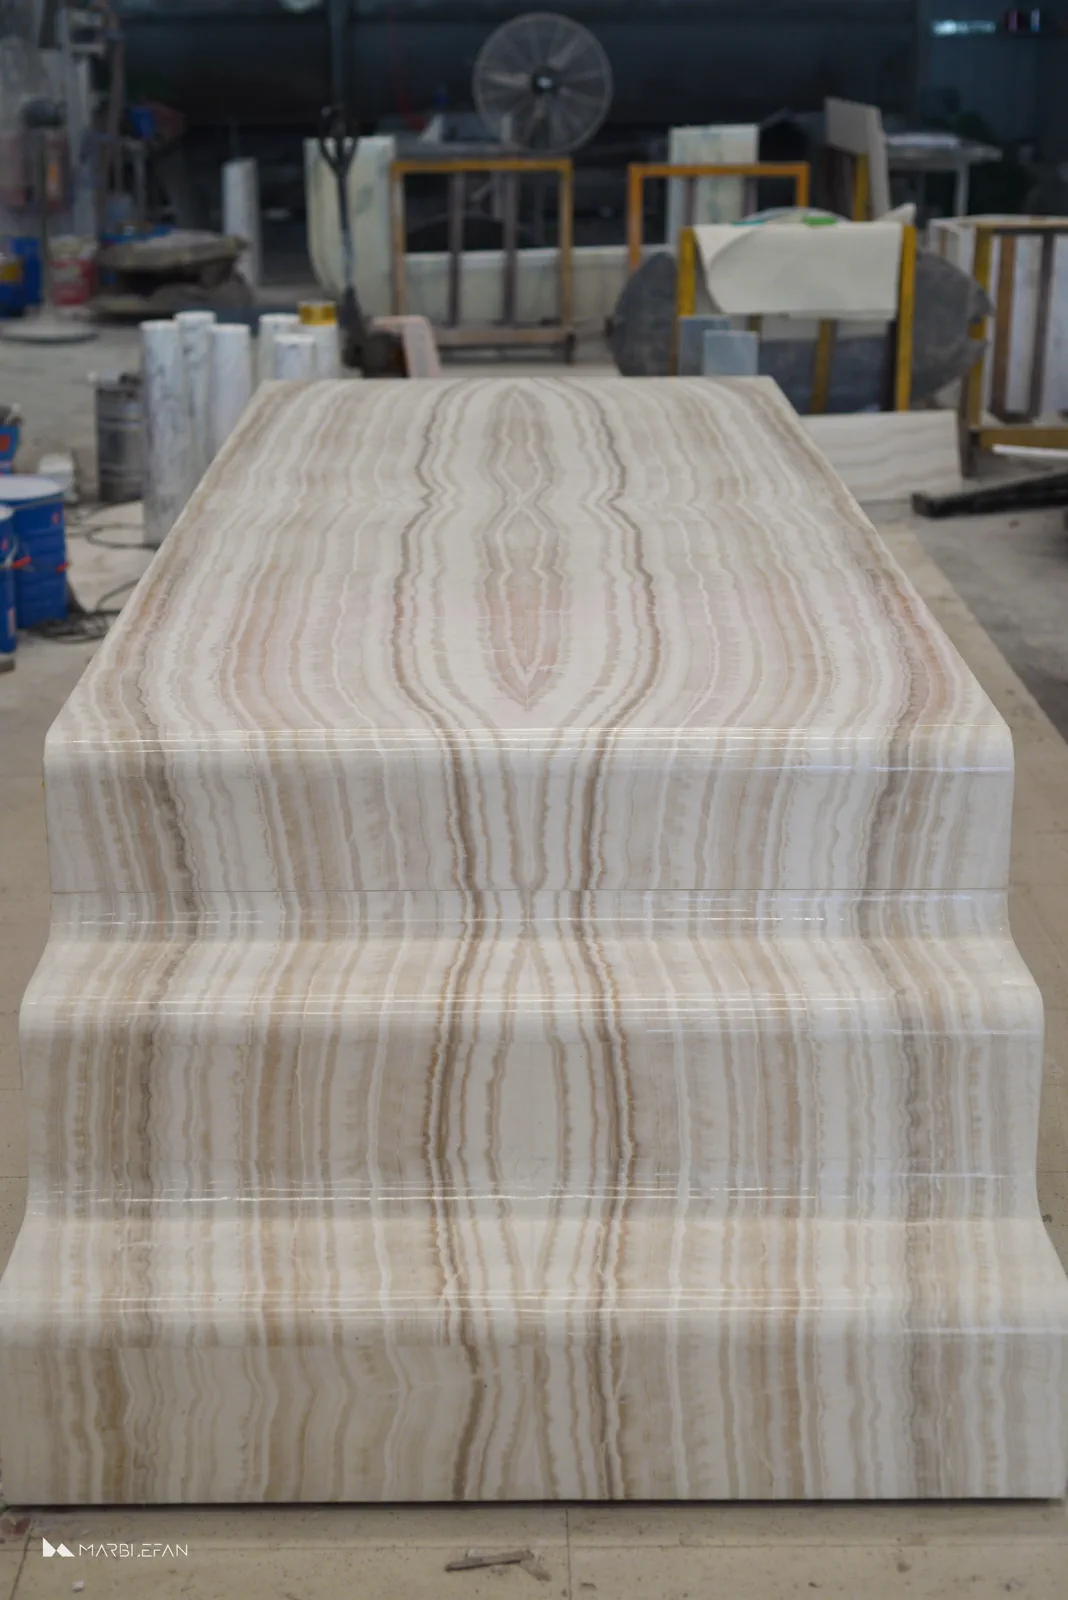
The finished table could not be transported or installed as a single four-metre object. Weight, access and safe handling required it to be divided into three main sections: a long central span and two stepped end modules.
That transport decision affected almost every later detail:
- where the steel frames would connect;
- where stone joints could be accepted visually;
- how power and lighting would continue between modules;
- how the parts could be packed, lifted and aligned on site.
The principal seams were therefore placed at the transitions between the straight central body and the curved stepped ends. This kept the most visible surfaces calm while giving the installation team clear assembly points.
From Seam Plan to Production Pieces
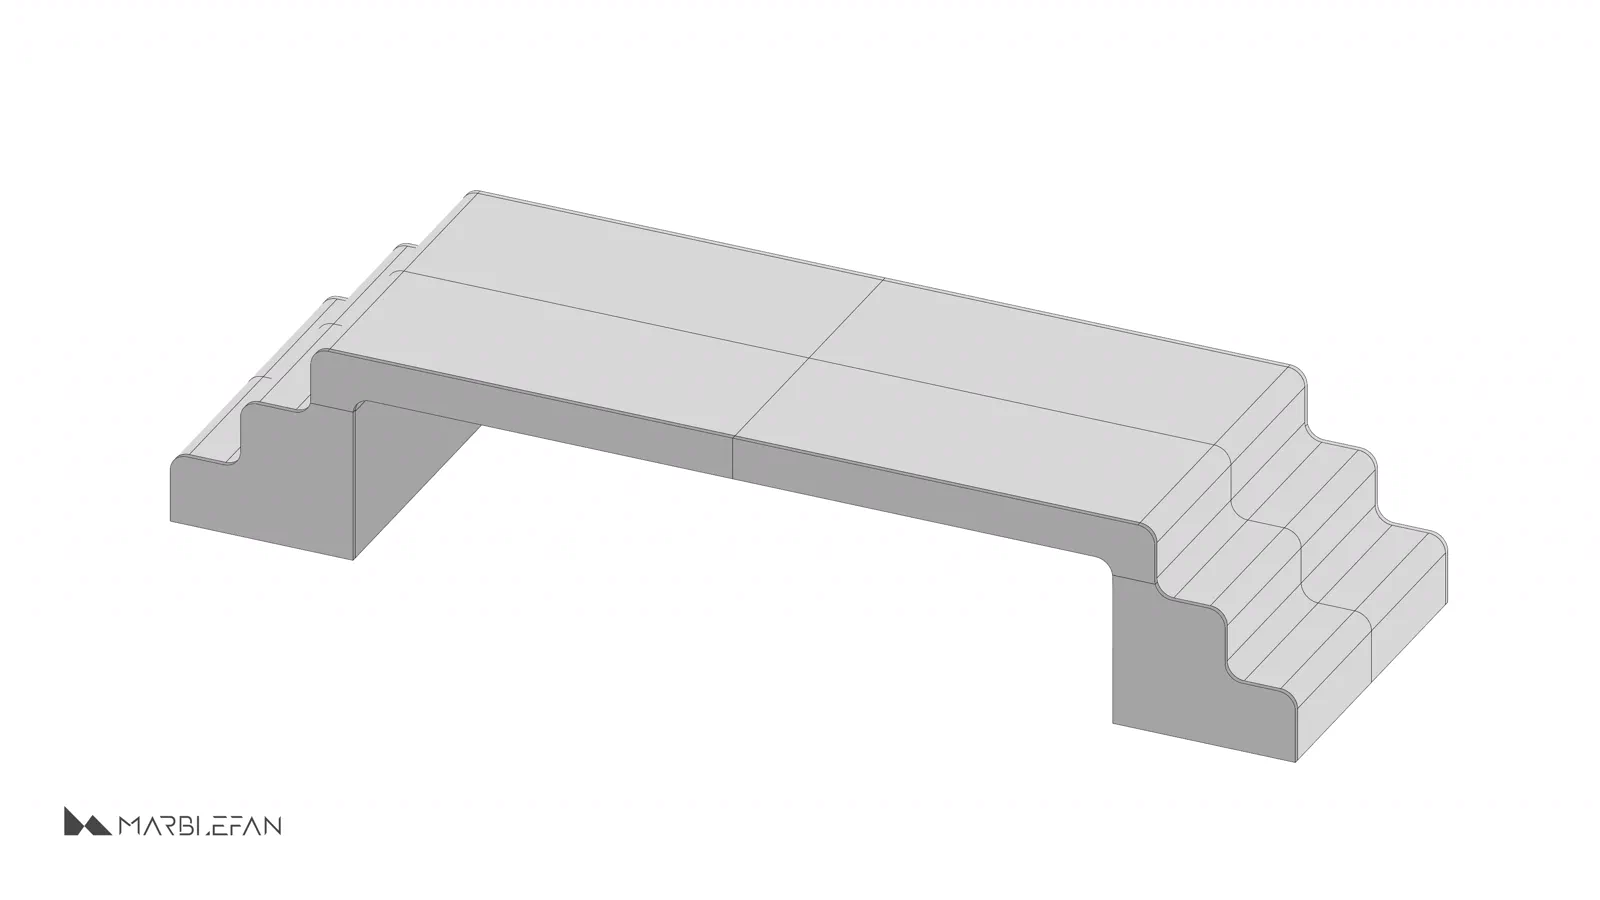
Once the module and seam strategy was confirmed, the stone skin was separated into individual cutting and forming pieces. Each part had to correspond with the vein layout, the steel frame and the installation sequence.
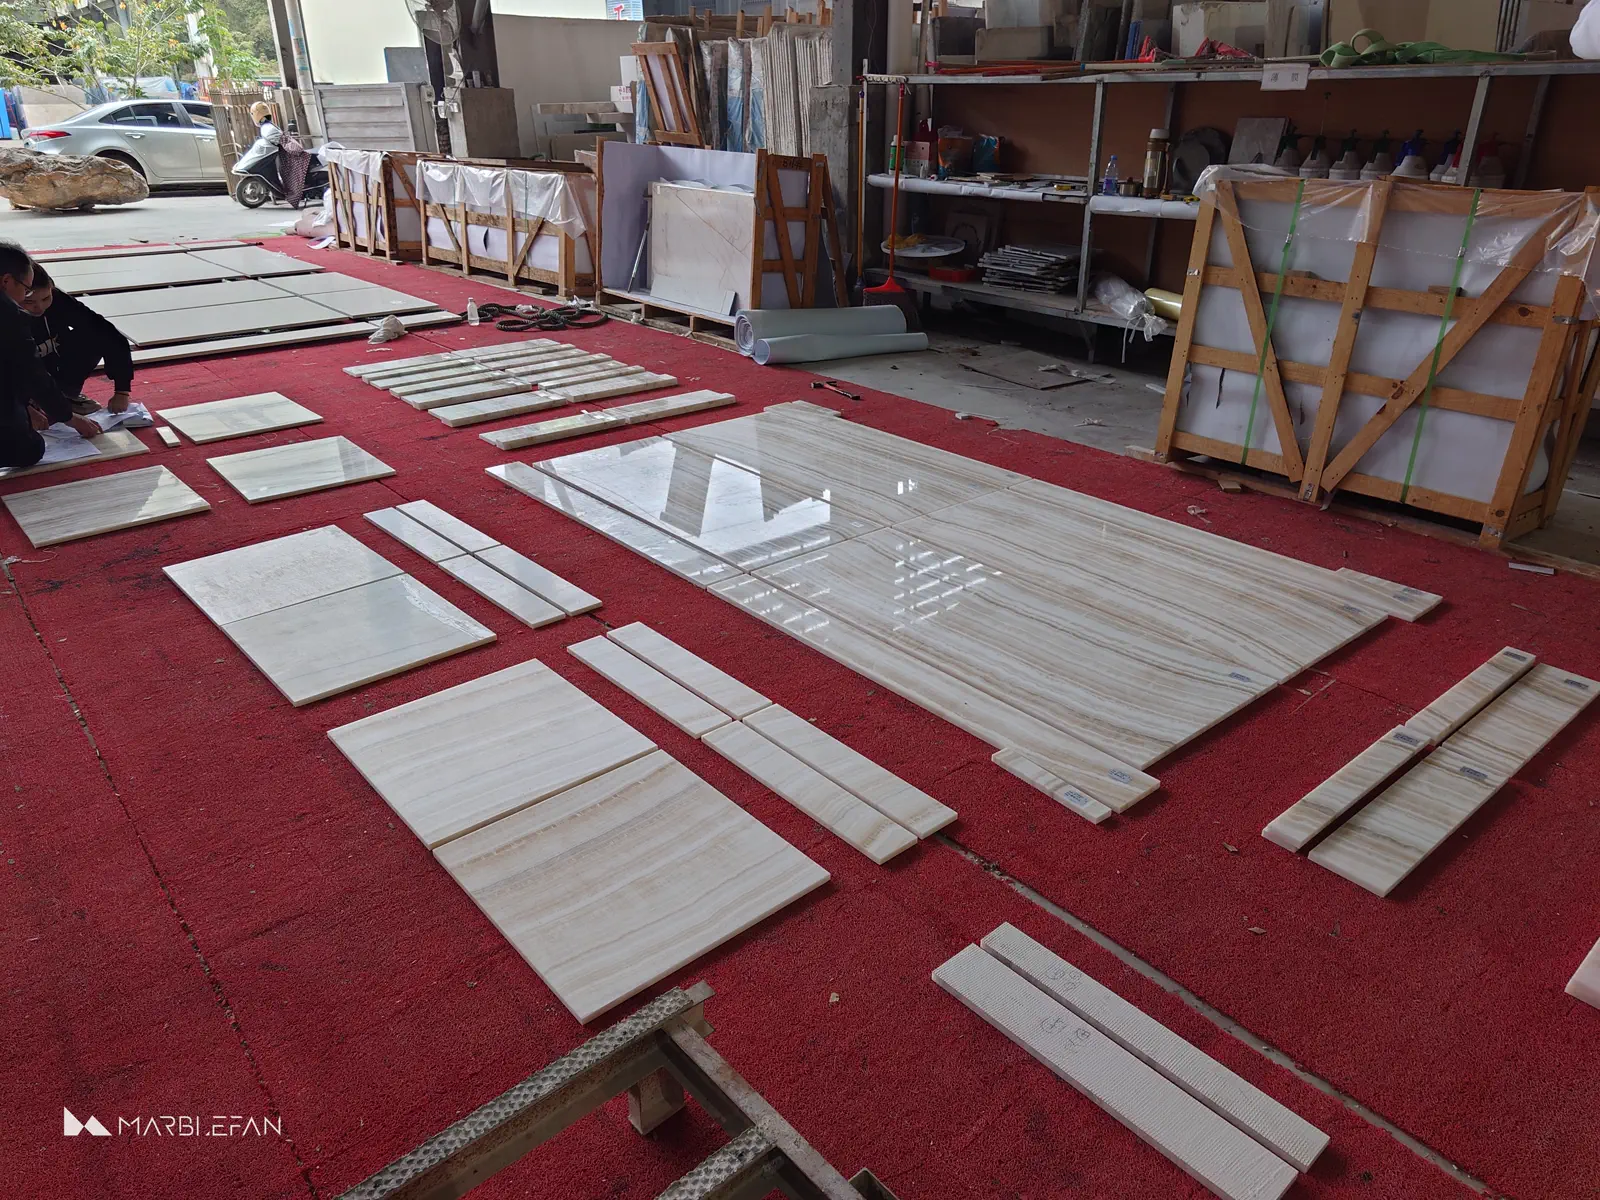
Before fabrication, the pieces were arranged at the factory to check:
- grain direction and mirrored relationships;
- panel dimensions and edge transitions;
- the order of curved and flat components;
- the relationship between the outer stone and internal support;
- whether the planned joints remained visually controlled.
This dry layout turned an abstract 3D model into a practical production map for the stone team.
A Steel Structure Designed Around Light
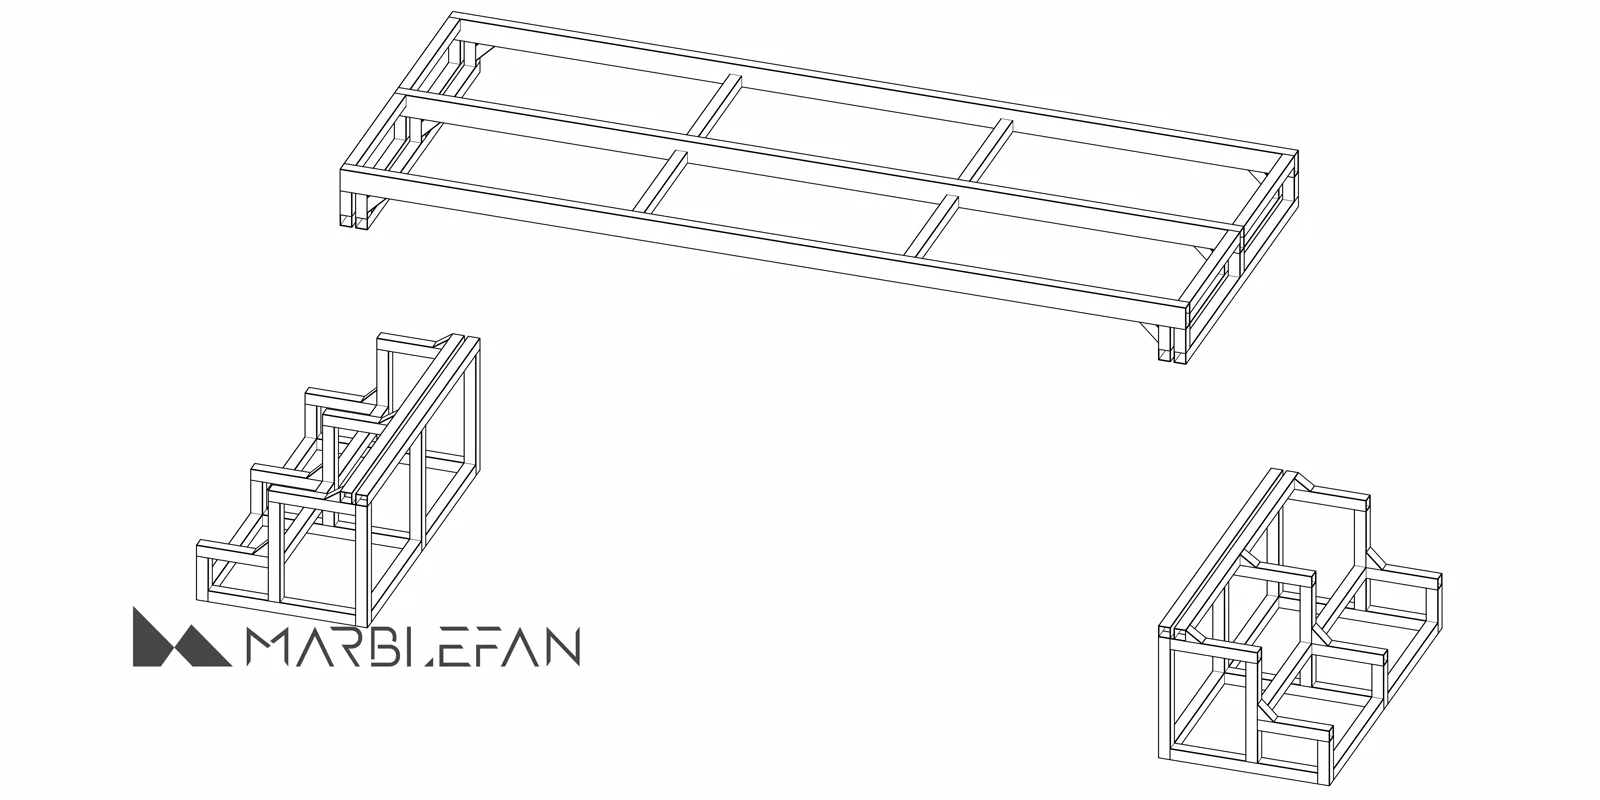
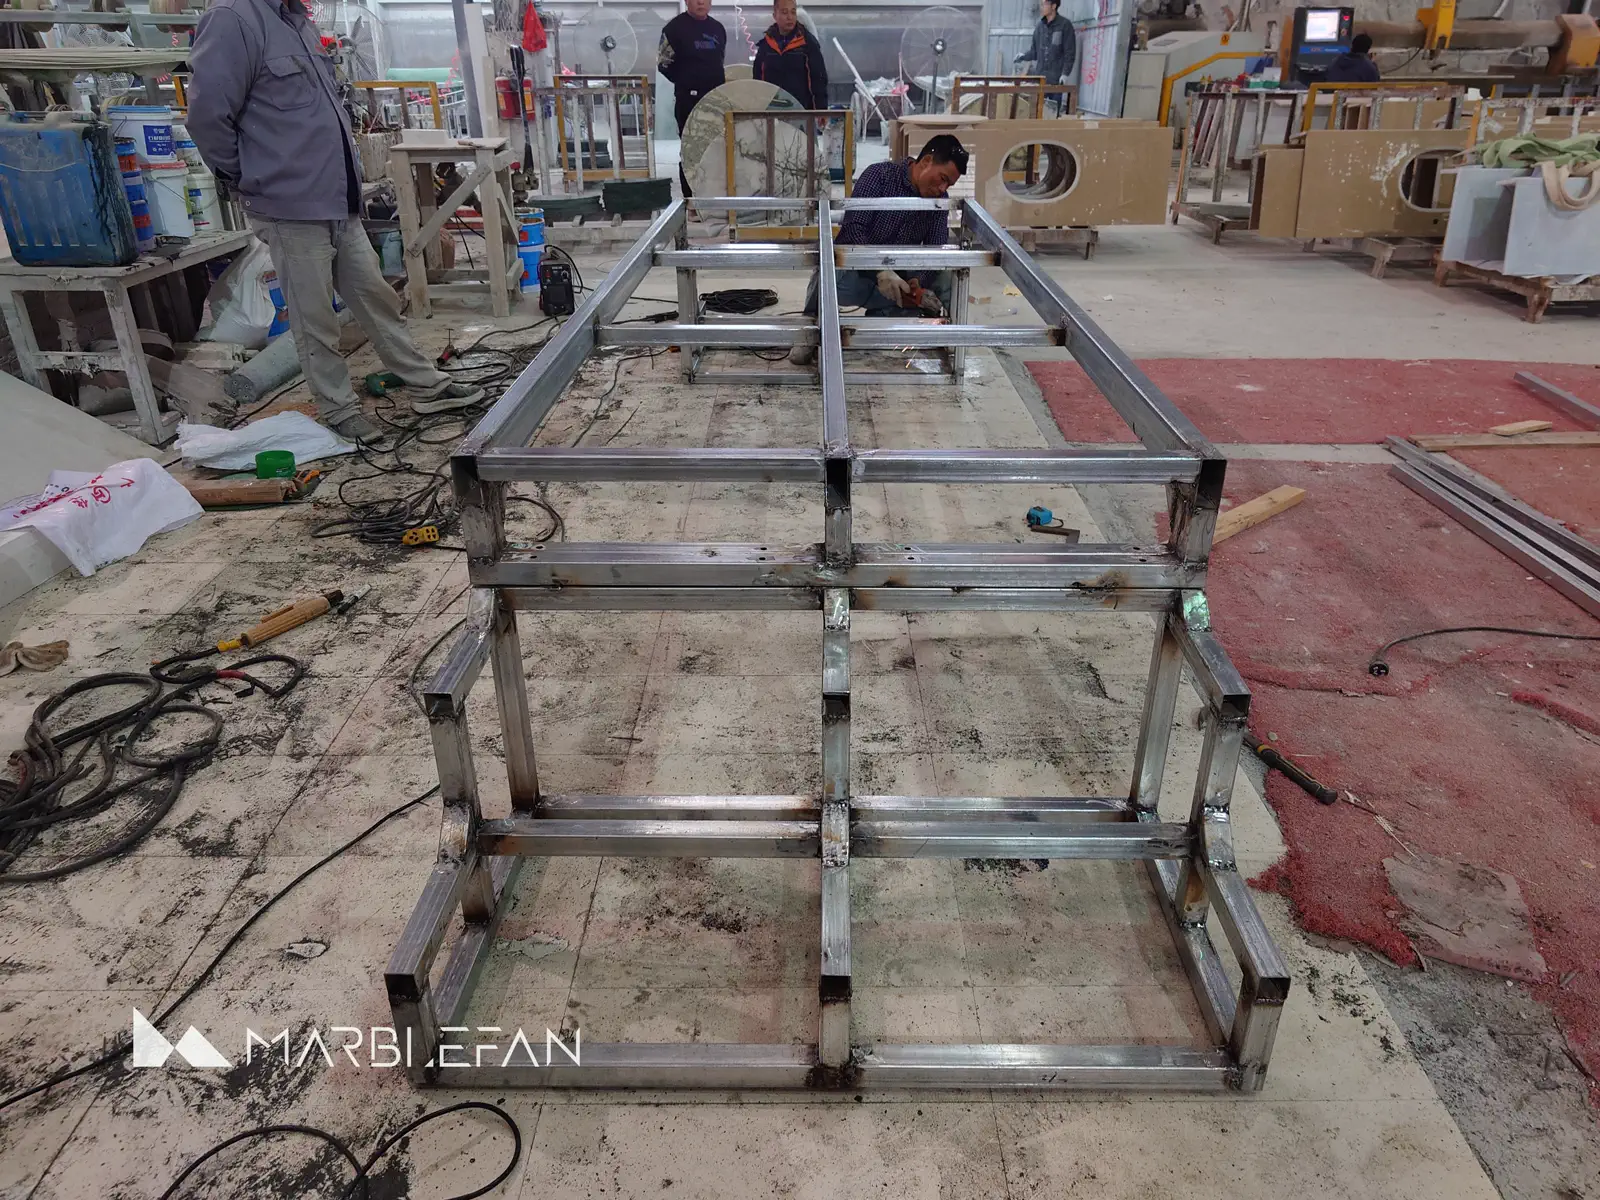
The tabletop included a central span of approximately three metres. The 18 mm stone cladding could not safely carry that span by itself, so a concealed steel substructure was developed to support the stone and keep the long profile visually light.
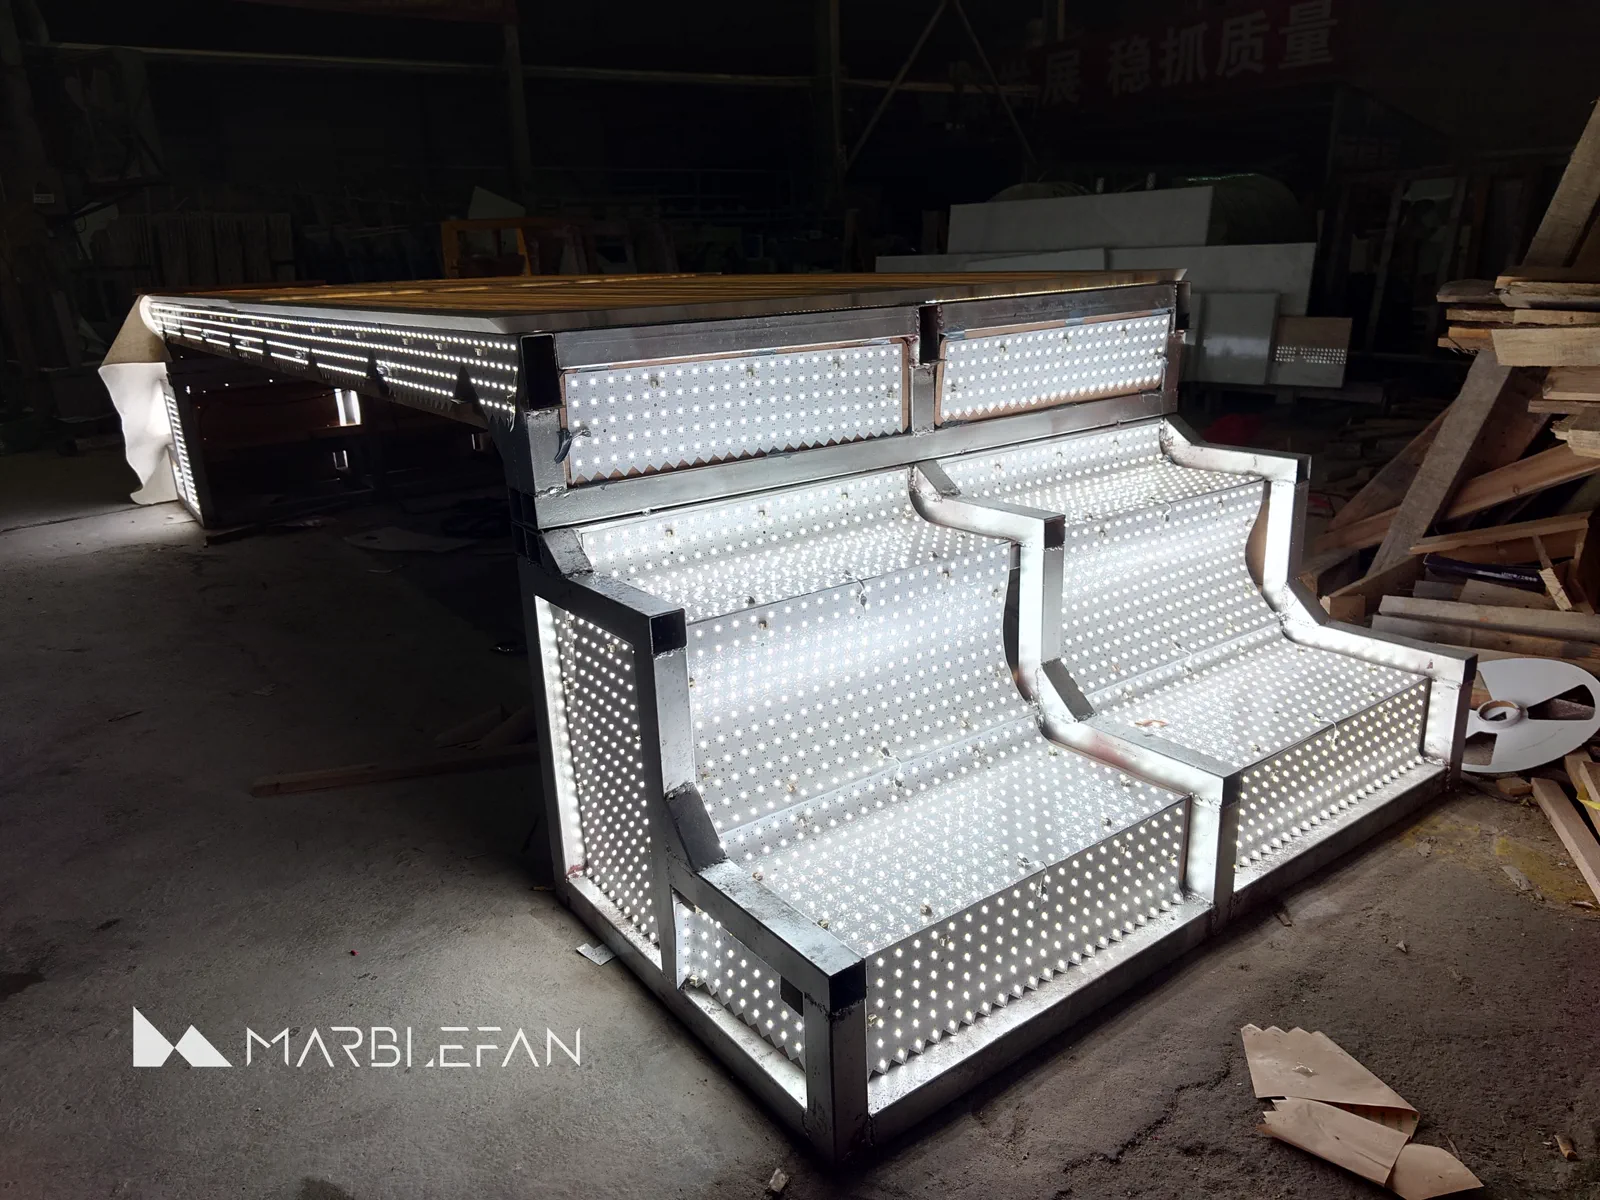
The frame was also split into three matching modules. Cross-members supported the tabletop, while the stepped end frames followed the changing geometry closely enough to receive both lighting sheets and stone panels.
The structure could not be designed independently from the lighting. Every steel member had the potential to block light and create a visible shadow through the translucent stone. The frame therefore had to balance four competing needs:
- structural support;
- space for lighting;
- access for assembly and maintenance;
- minimal interruption to the illuminated surface.
Assembly Sequence
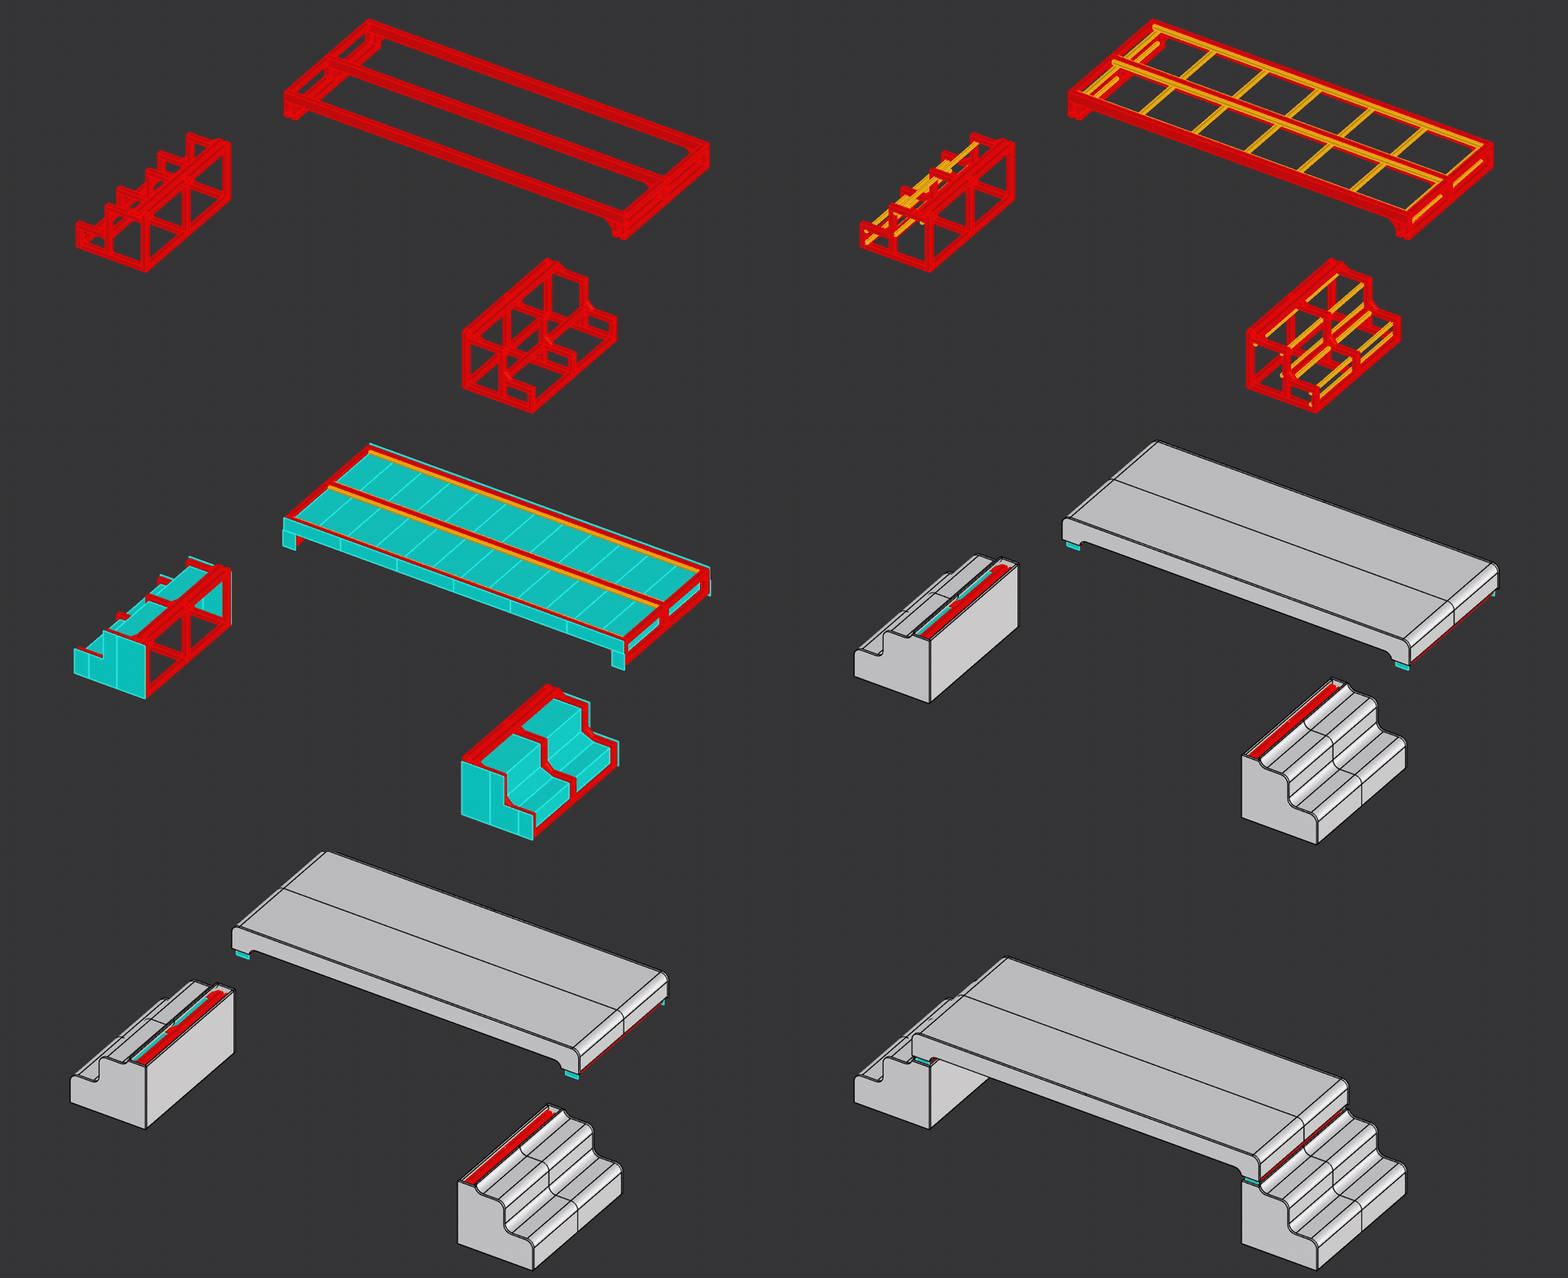
The animation below shows how the three steel modules, lighting surfaces and stone cladding were coordinated before production.
Why Flexible LED Sheets Were Used
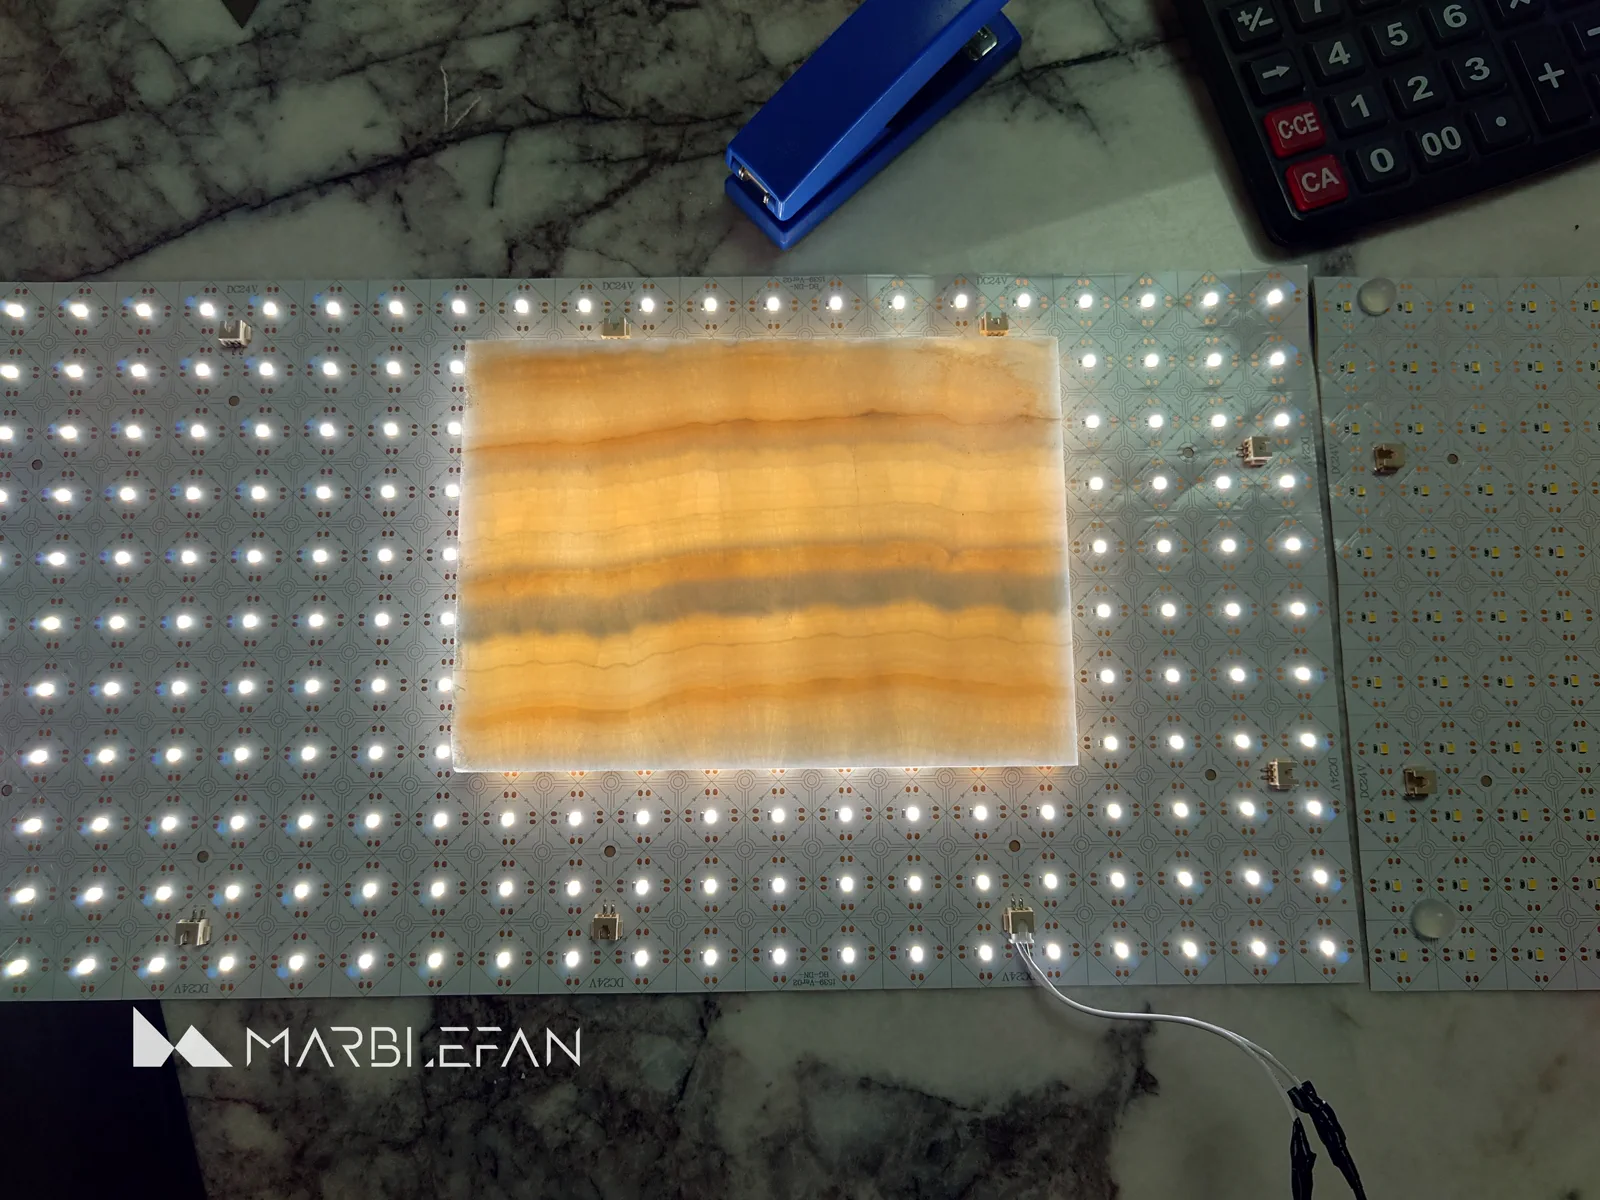
Conventional rigid light panels would have been difficult to fit around the stepped and curved geometry. Flexible LED sheets offered a more adaptable solution: they could be cut, folded and distributed across both flat and shaped surfaces.
A material lighting test was carried out before installation. This helped us evaluate the brightness, colour and visibility of the stone bands before the full table was assembled.
The selected system also produced relatively little heat, an important consideration inside a narrow enclosed structure where light would remain close to the stone.
Factory Assembly and Lighting Test
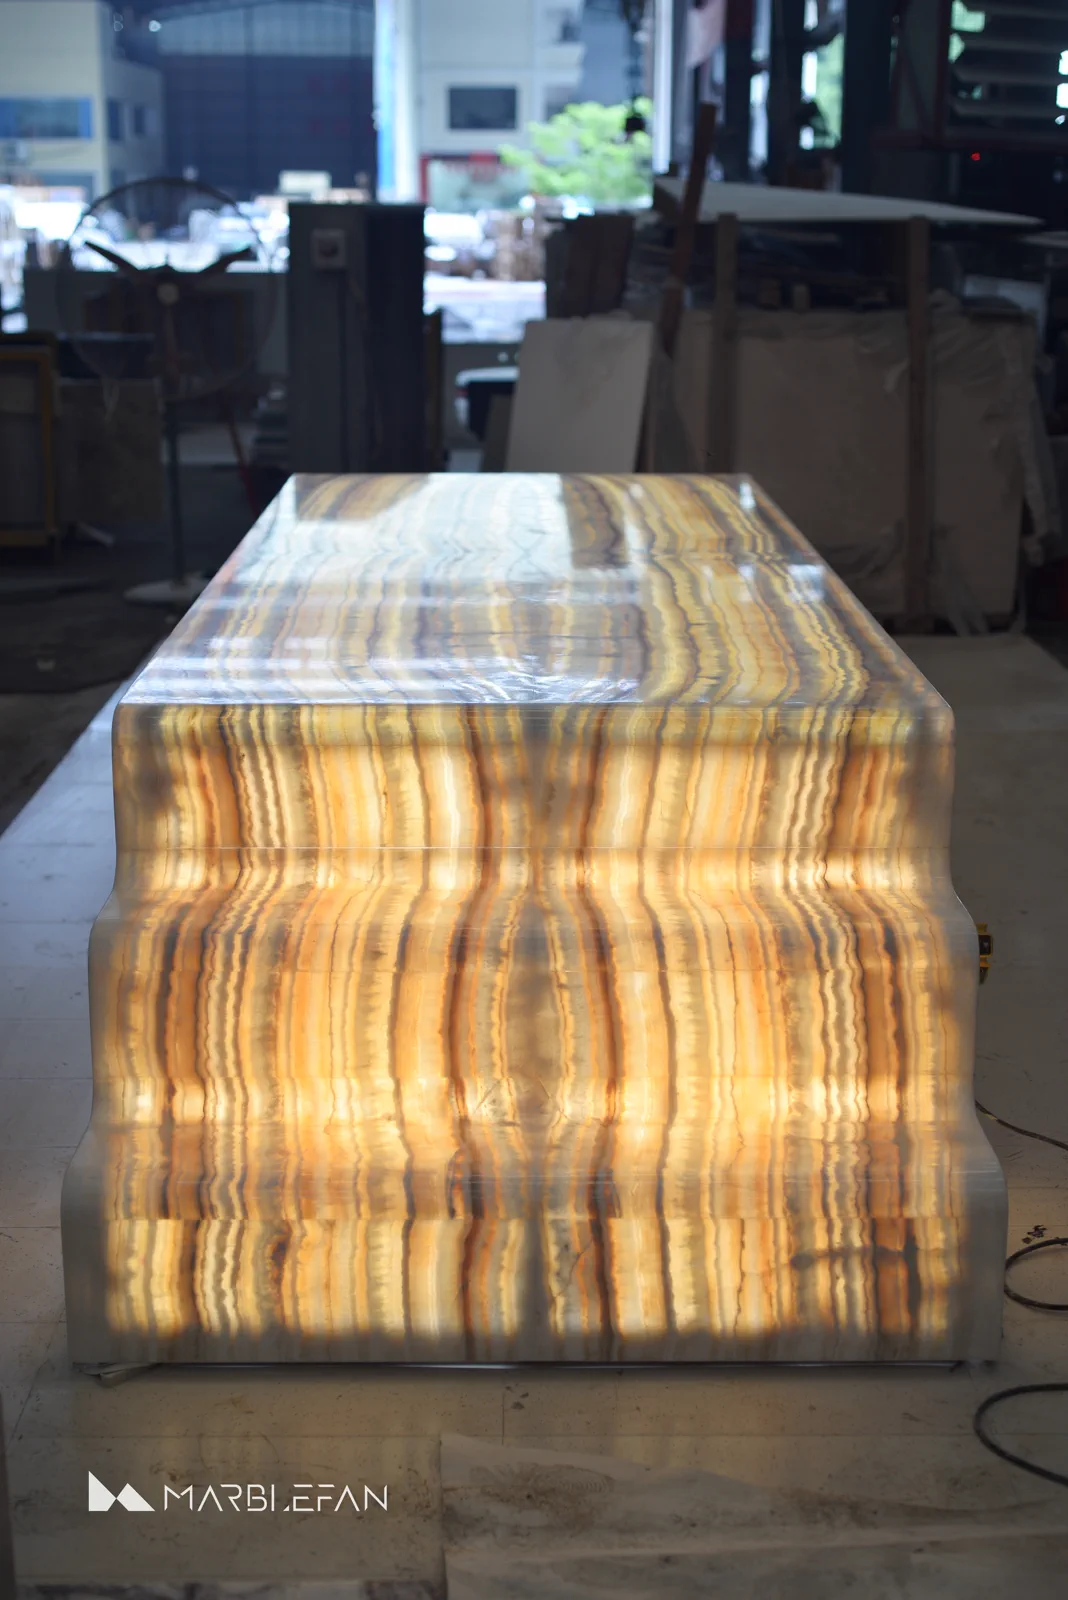
The steel structure, LED sheets and finished stone components were assembled at the factory before shipment. Testing the complete piece at this stage allowed the team to check joint alignment, vein continuity and the lighting effect while adjustments were still possible.
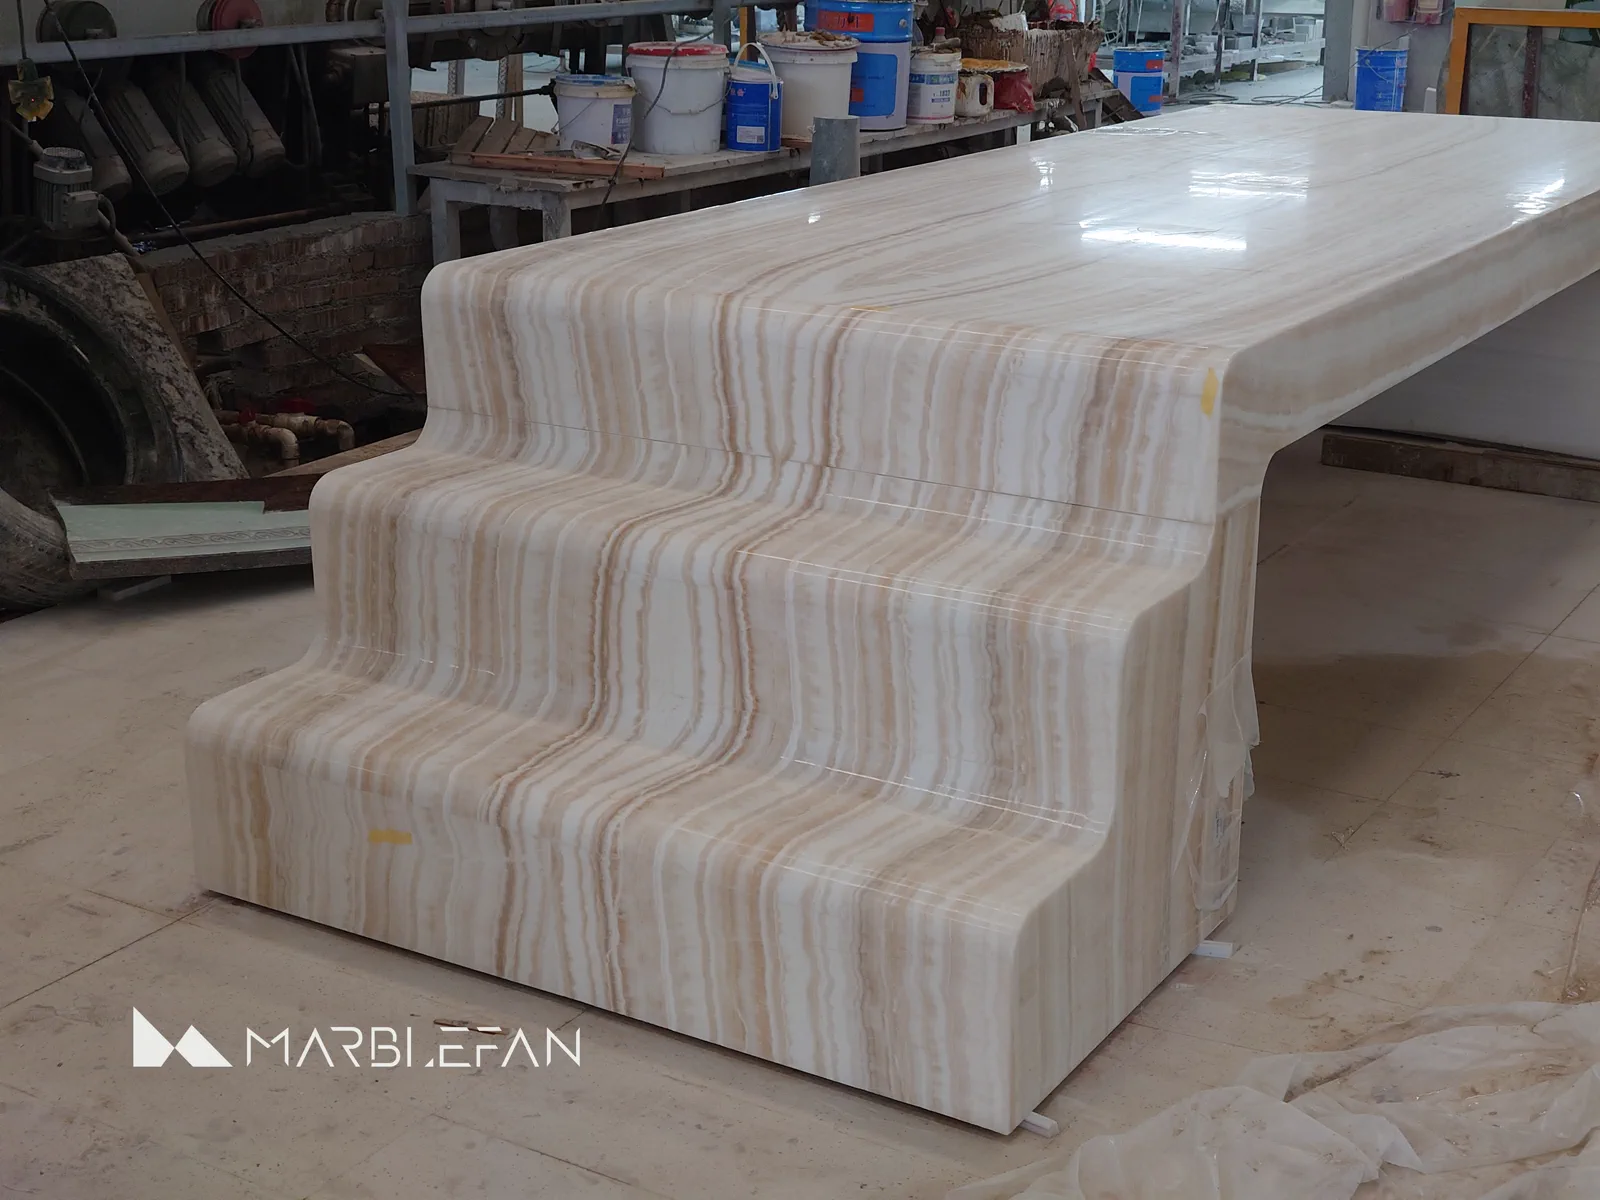
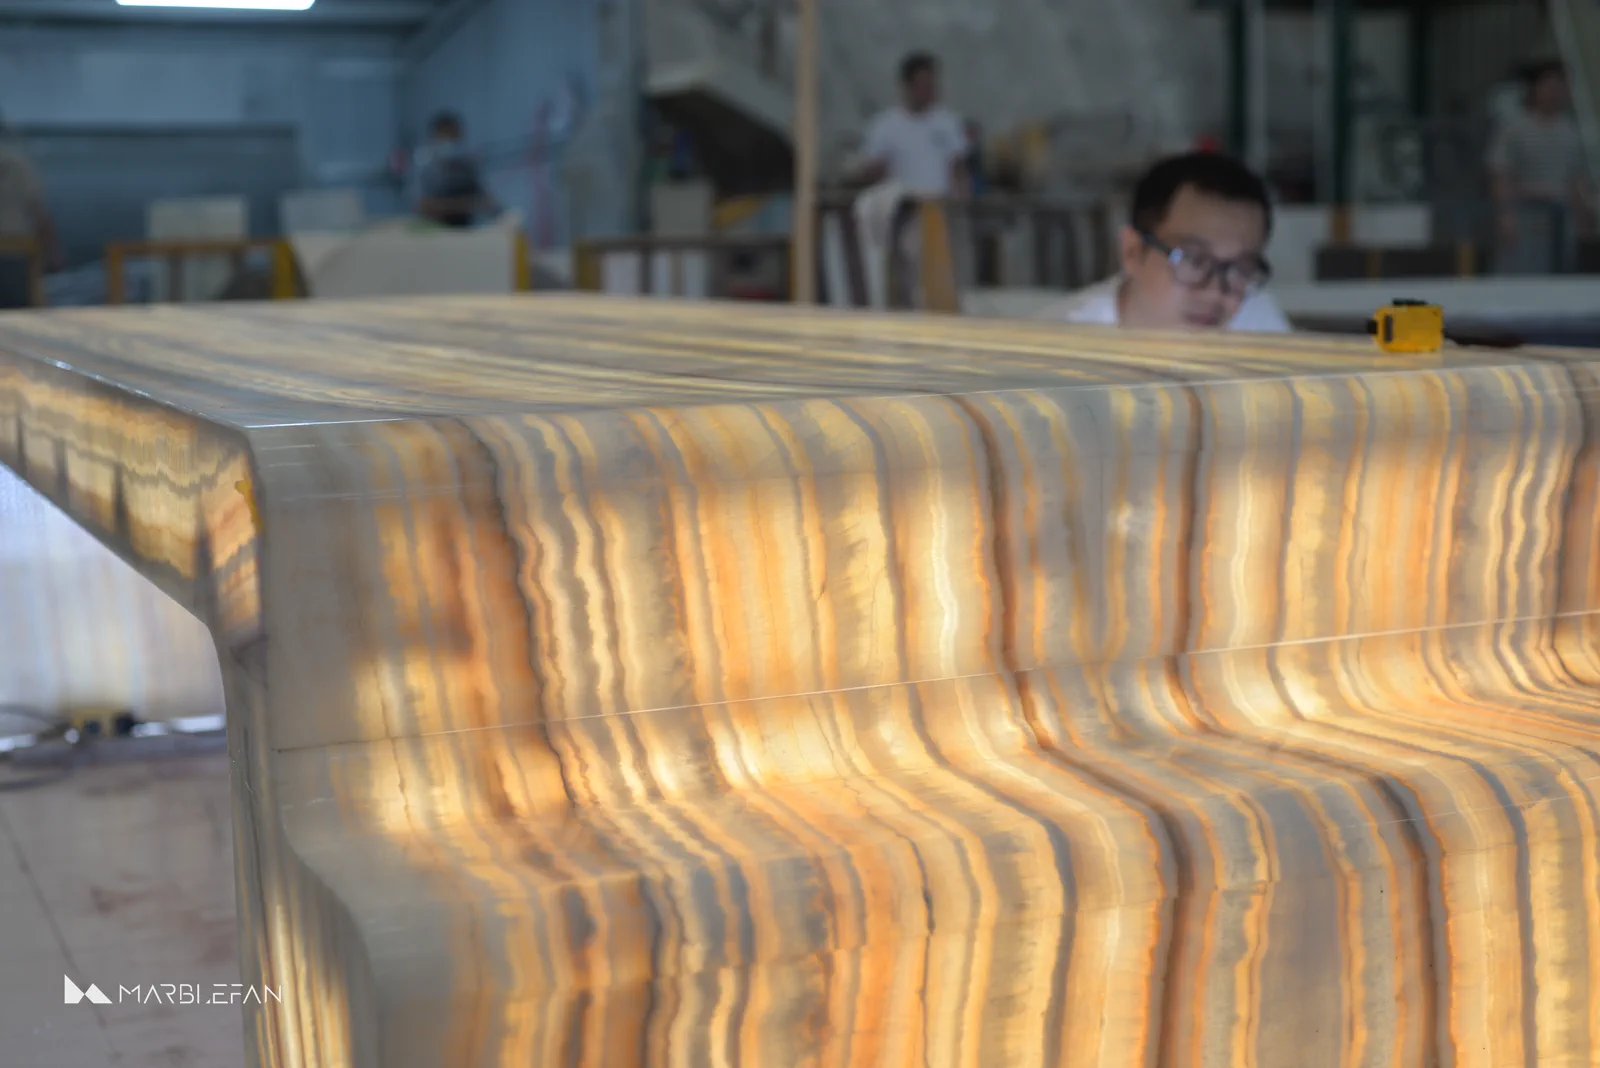
With the lights off, the stone reads as a calm, pale surface with warm linear bands. When illuminated, the same bands gain depth and contrast, turning the table into a glowing architectural object.
An Honest Trade-Off
Not every technical requirement can disappear completely.
The vertical stone along the side of the long tabletop carried considerable self-weight and did not rest directly on the floor. Adhesive fixing alone would not provide an acceptable safety margin, so this panel was mechanically dry-fixed to the supporting structure.
That connection was the safer structural choice, but it also interrupted part of the light path. During the factory lighting test, a subtle horizontal shadow became visible along the fixing zone.
This detail illustrates an important principle in backlit stone furniture: lighting, structure and fixing methods must be developed as one system. A visually perfect lighting concept cannot come at the expense of safe support. Where structure must take priority, the remaining shadow should be understood, tested and managed — not ignored.
What This Helps You Decide Before Custom Production
1. How will the stone look when illuminated?
Reviewing slab selection, translucency tests and vein mapping before cutting helps you understand whether the chosen stone can produce the visual effect you expect. Lighting cannot correct an unplanned pattern later, so this early coordination is especially important for highly linear stone. In the right material, a mirrored or centred layout can create a calmer, more intentional result.
2. Where can transport joints sit without disturbing the form?
Large custom furniture often needs to travel in modules. Considering transport access and installation early helps necessary joints land where the geometry already changes, instead of cutting across the most visible surfaces.
3. Can the structure support the stone without compromising the light?
Steel provides the safety that thin stone panels cannot provide alone, but every support can influence the light. Reviewing the frame, fixing points, wiring and lighting coverage in the same 3D model helps you understand the trade-off between structural safety and visual expectations before production begins.
4. What should be tested before the piece leaves the factory?
Stone translucency, local shadows and subtle alignment issues become clear only when the complete piece is illuminated. A full dry assembly and lighting test gives the project team a final opportunity to review and adjust the piece before shipping.
Turning a Design Idea into a Buildable Stone Piece
A custom stone table may begin with a reference image or a strong visual idea. The quality of the final piece, however, depends on the decisions made between concept and fabrication: material layout, seam placement, structural support, lighting access, transport and installation.
At MarbleFan, we help clients and designers develop those decisions into coordinated, production-ready solutions.
Have a stone furniture idea or reference image you would like to explore?
Ready to explore a custom stone furniture idea?
Share a reference image, dimension, or material direction with MarbleFan, and we can help turn the idea into a buildable stone solution.